I will teach you how to add moving visuals to any song in Adobe After Effects. This can be helpful if you want a custom on visualizer for a song. I will be using one image file, found on Unsplash.
Step 1: Create a 1080 x 1920 composition and set the time to the length of the song.
Step 2: Load the track and photo or video into the composition
Step 3: Add the effect you wish to automate with keyframes. I am using the built in CC Kaleida effect to create visual effects for the song. But the keyframe technique can be applied to any effect.
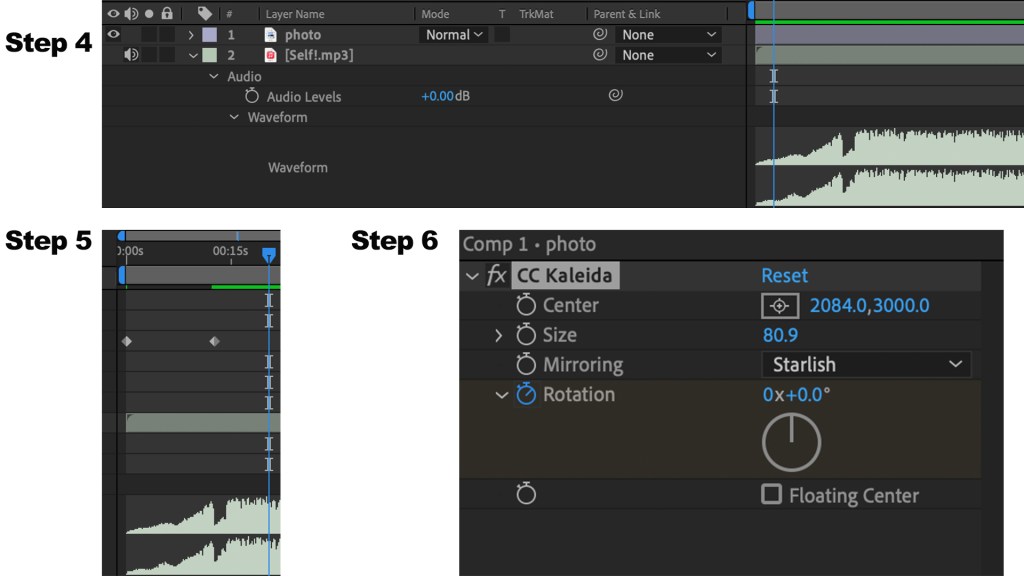
Step 4: Click the audio in the bottom left corner. Click the dropdown audio and waveform options to reveal the songs waveform. I am using a song called Self! by Isaia Huron. Here you will be able to see the major changes in the song and keyframe accordingly.
Step 5: Set your desired parameters and click the stopwatch icon next to the effect you would like to animate. Find a point in the song where you would like to change the automation settings and see if you like your result.
Step 6: Continue to automate different effects at different points in the song, using the waveform as the guides to align the keyframes. Keyframes will change at the point your marker is at when you change the parameter on the effect. I am mostly changing the Kaleidoscope rotation parameter. Holding shift will align your selection to the marker when setting points.
Step 7: Play with parameters such as opacity, scale, rotation, and overlay effects! Color Balance HLS is another good effect for changing the hue.
Step 8: Repeat till you are satisfied with the result! Add to Adobe Media Encoder Cue and now you have a visual to your song!
Here are my results!
